As I said in a previous post, the plan here is to create a series of posts around pfSense setup, routing, VLANs, VPN connectivity and a bit more about Firewalls. But the first step is to get your new Protectli Vault installed with pfSense and the basics configured to you get you online, or back online with your new router in place.
pfSense: Download and Installation
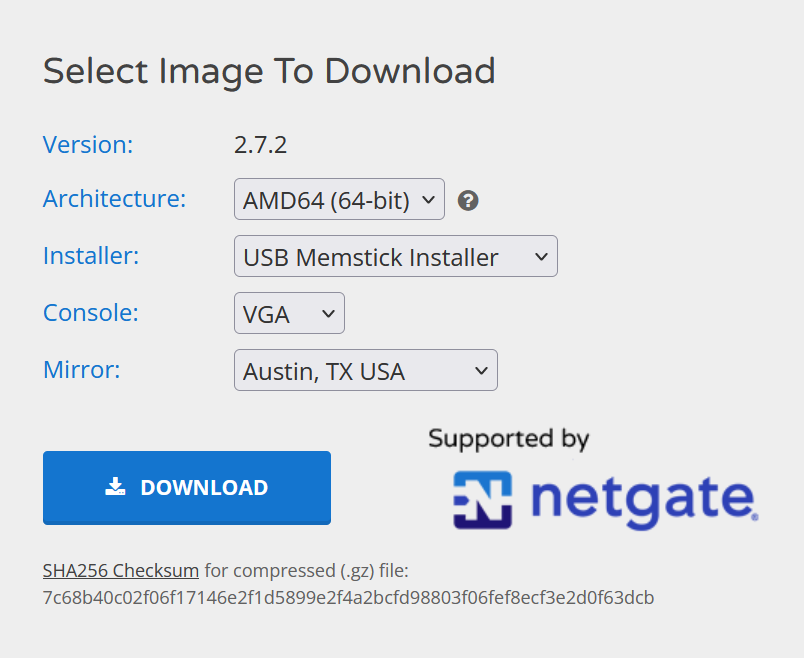
To start with, like anything you want to install you either need to have an installation disk (USB or CD) available or download the software. To download pfSense you simply need to head to their website and download the image.
NB. It’s worth noting, at this point, that pfSense can easily be virtualised either locally or cloud-based and that, if you don’t want to spend the money, there are cheaper options than the Protectli Vault, which is a beast.
I’ve used Rufus to install the image on a USB drive I had lying around. Just plug in the USB drive to your PC, select it as the target drive and the image you’ve just downloaded. Imaging the USB drive should take only a couple of minutes at worst. Once complete, remove the USB drive from your computer and plug it into the Protectli Vault.
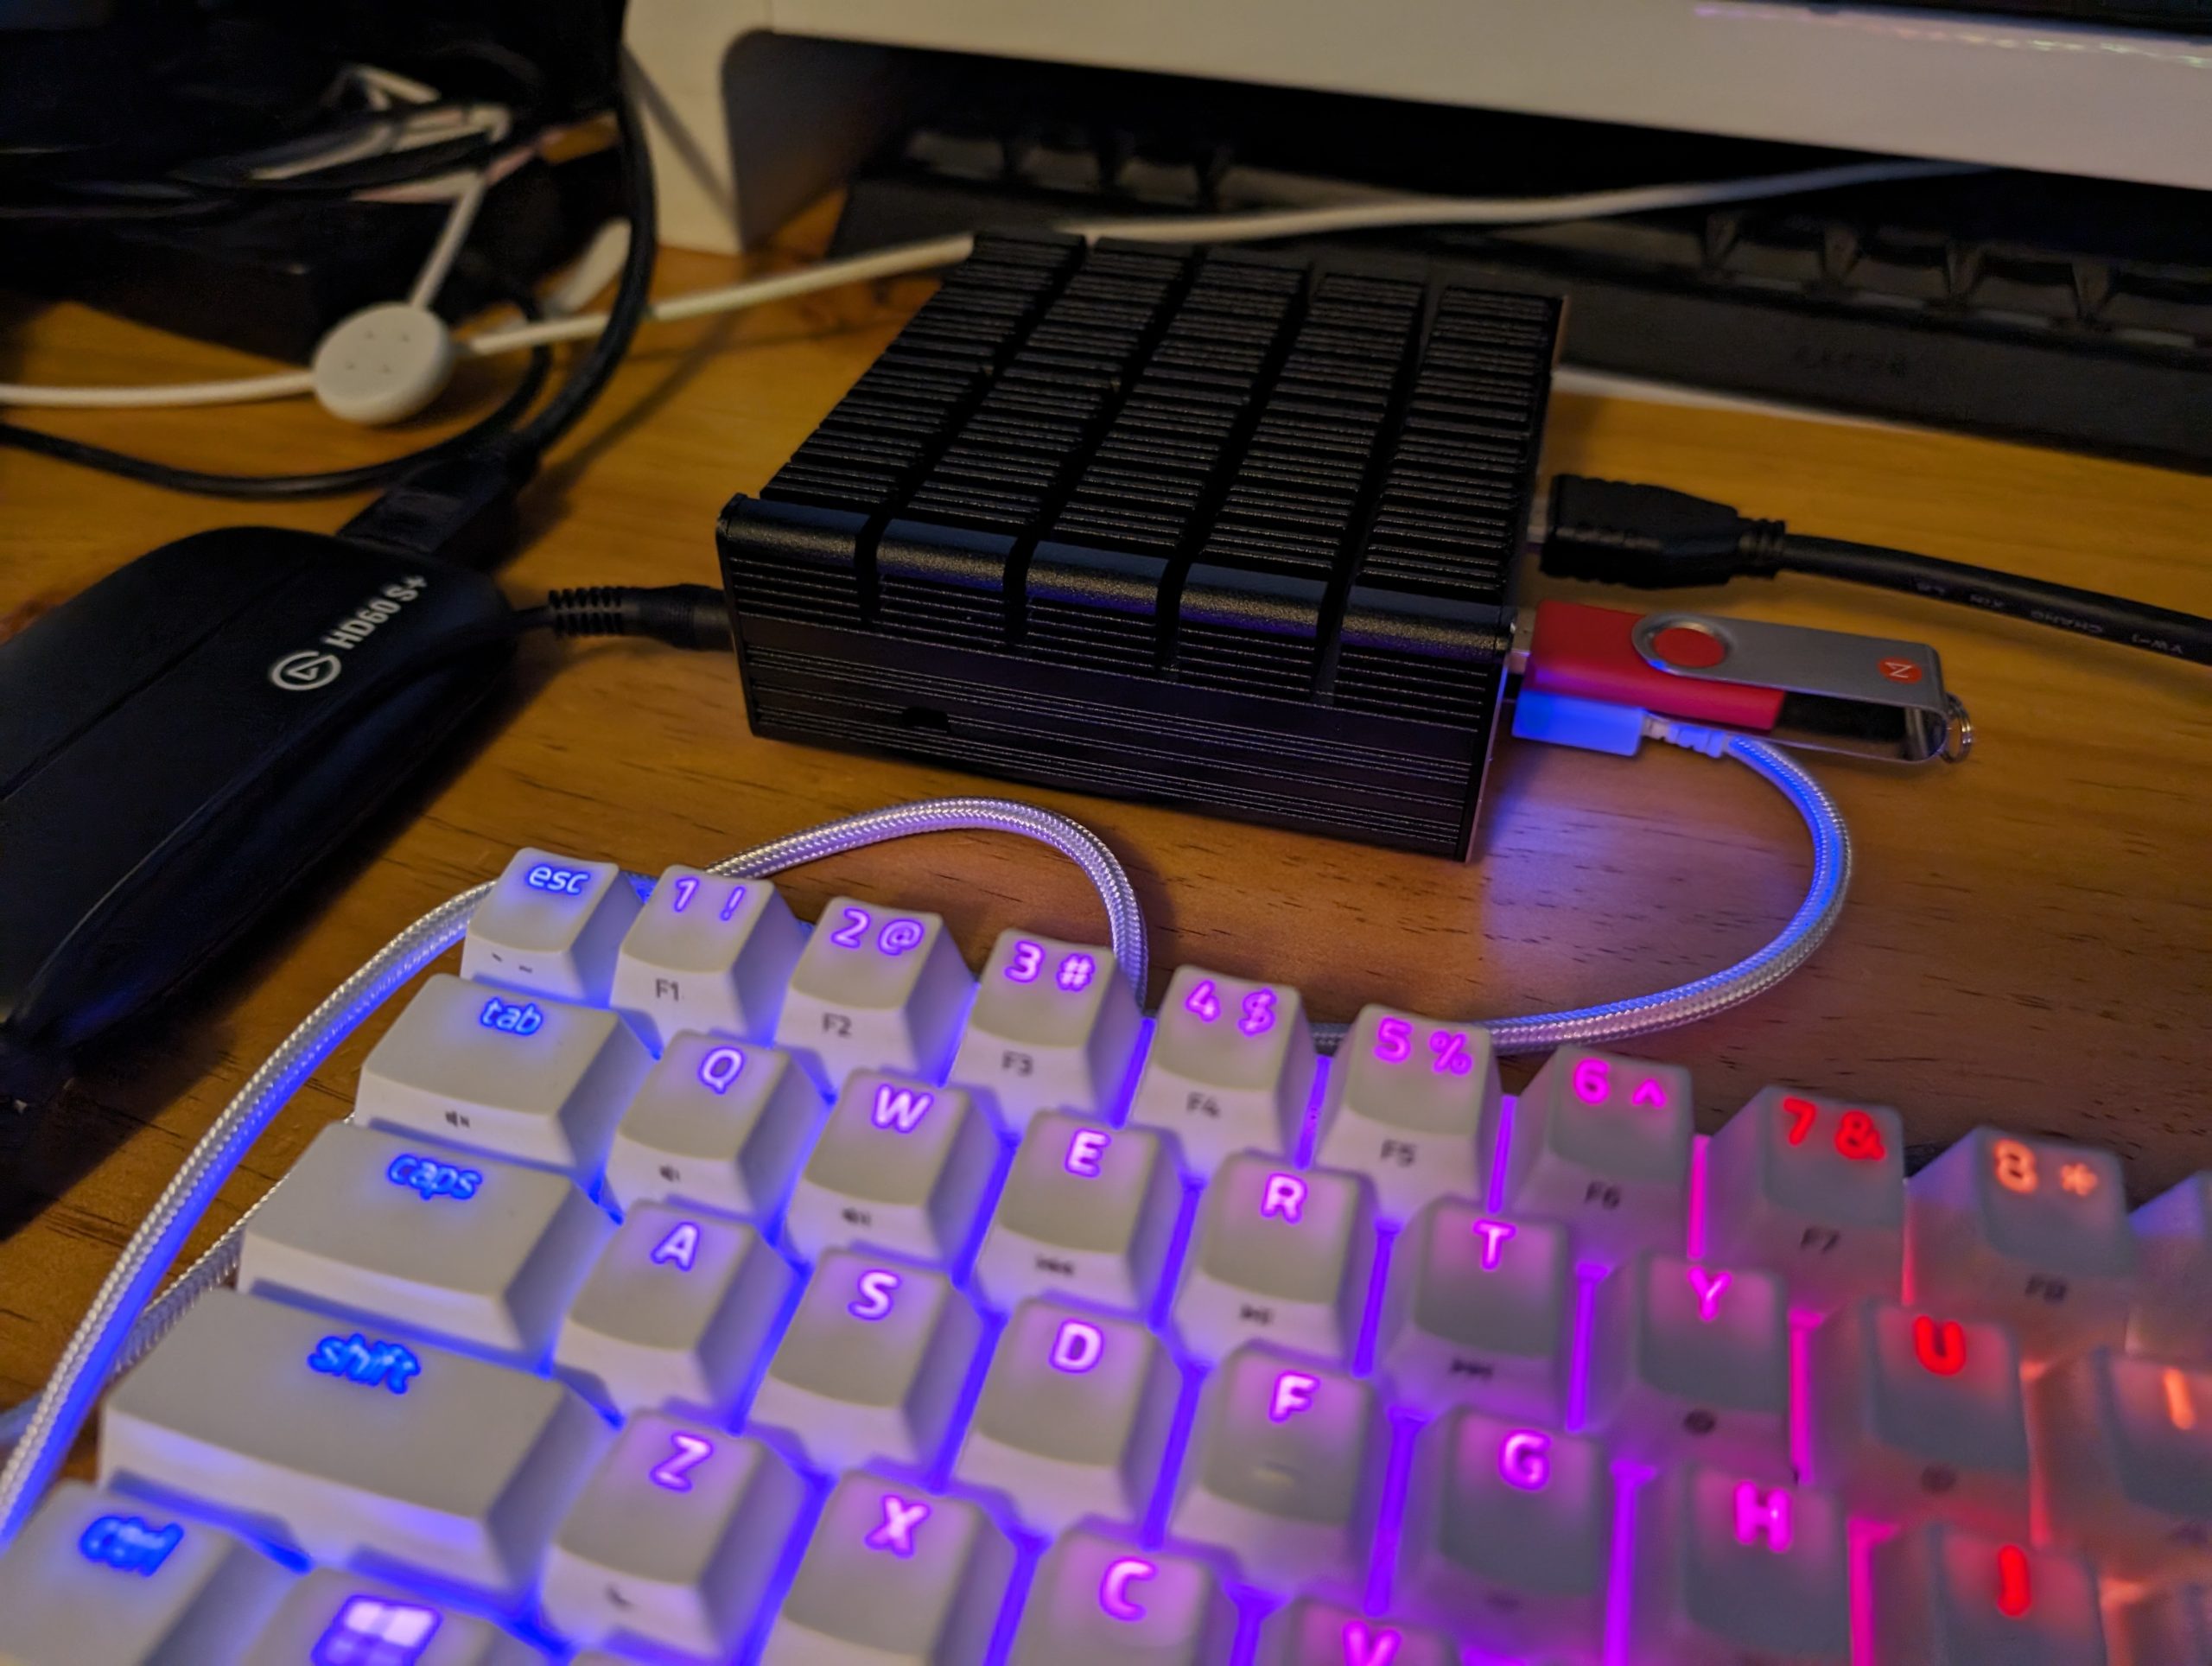
The next step is easiest if you’ve got a keyboard and monitor available, simply plug in the keyboard, monitor, power and USB drive you’ve just imaged. Then turn on the device and follow the on-screen instructions to install pfSense onto the Vault.
The options you will need to follow include:
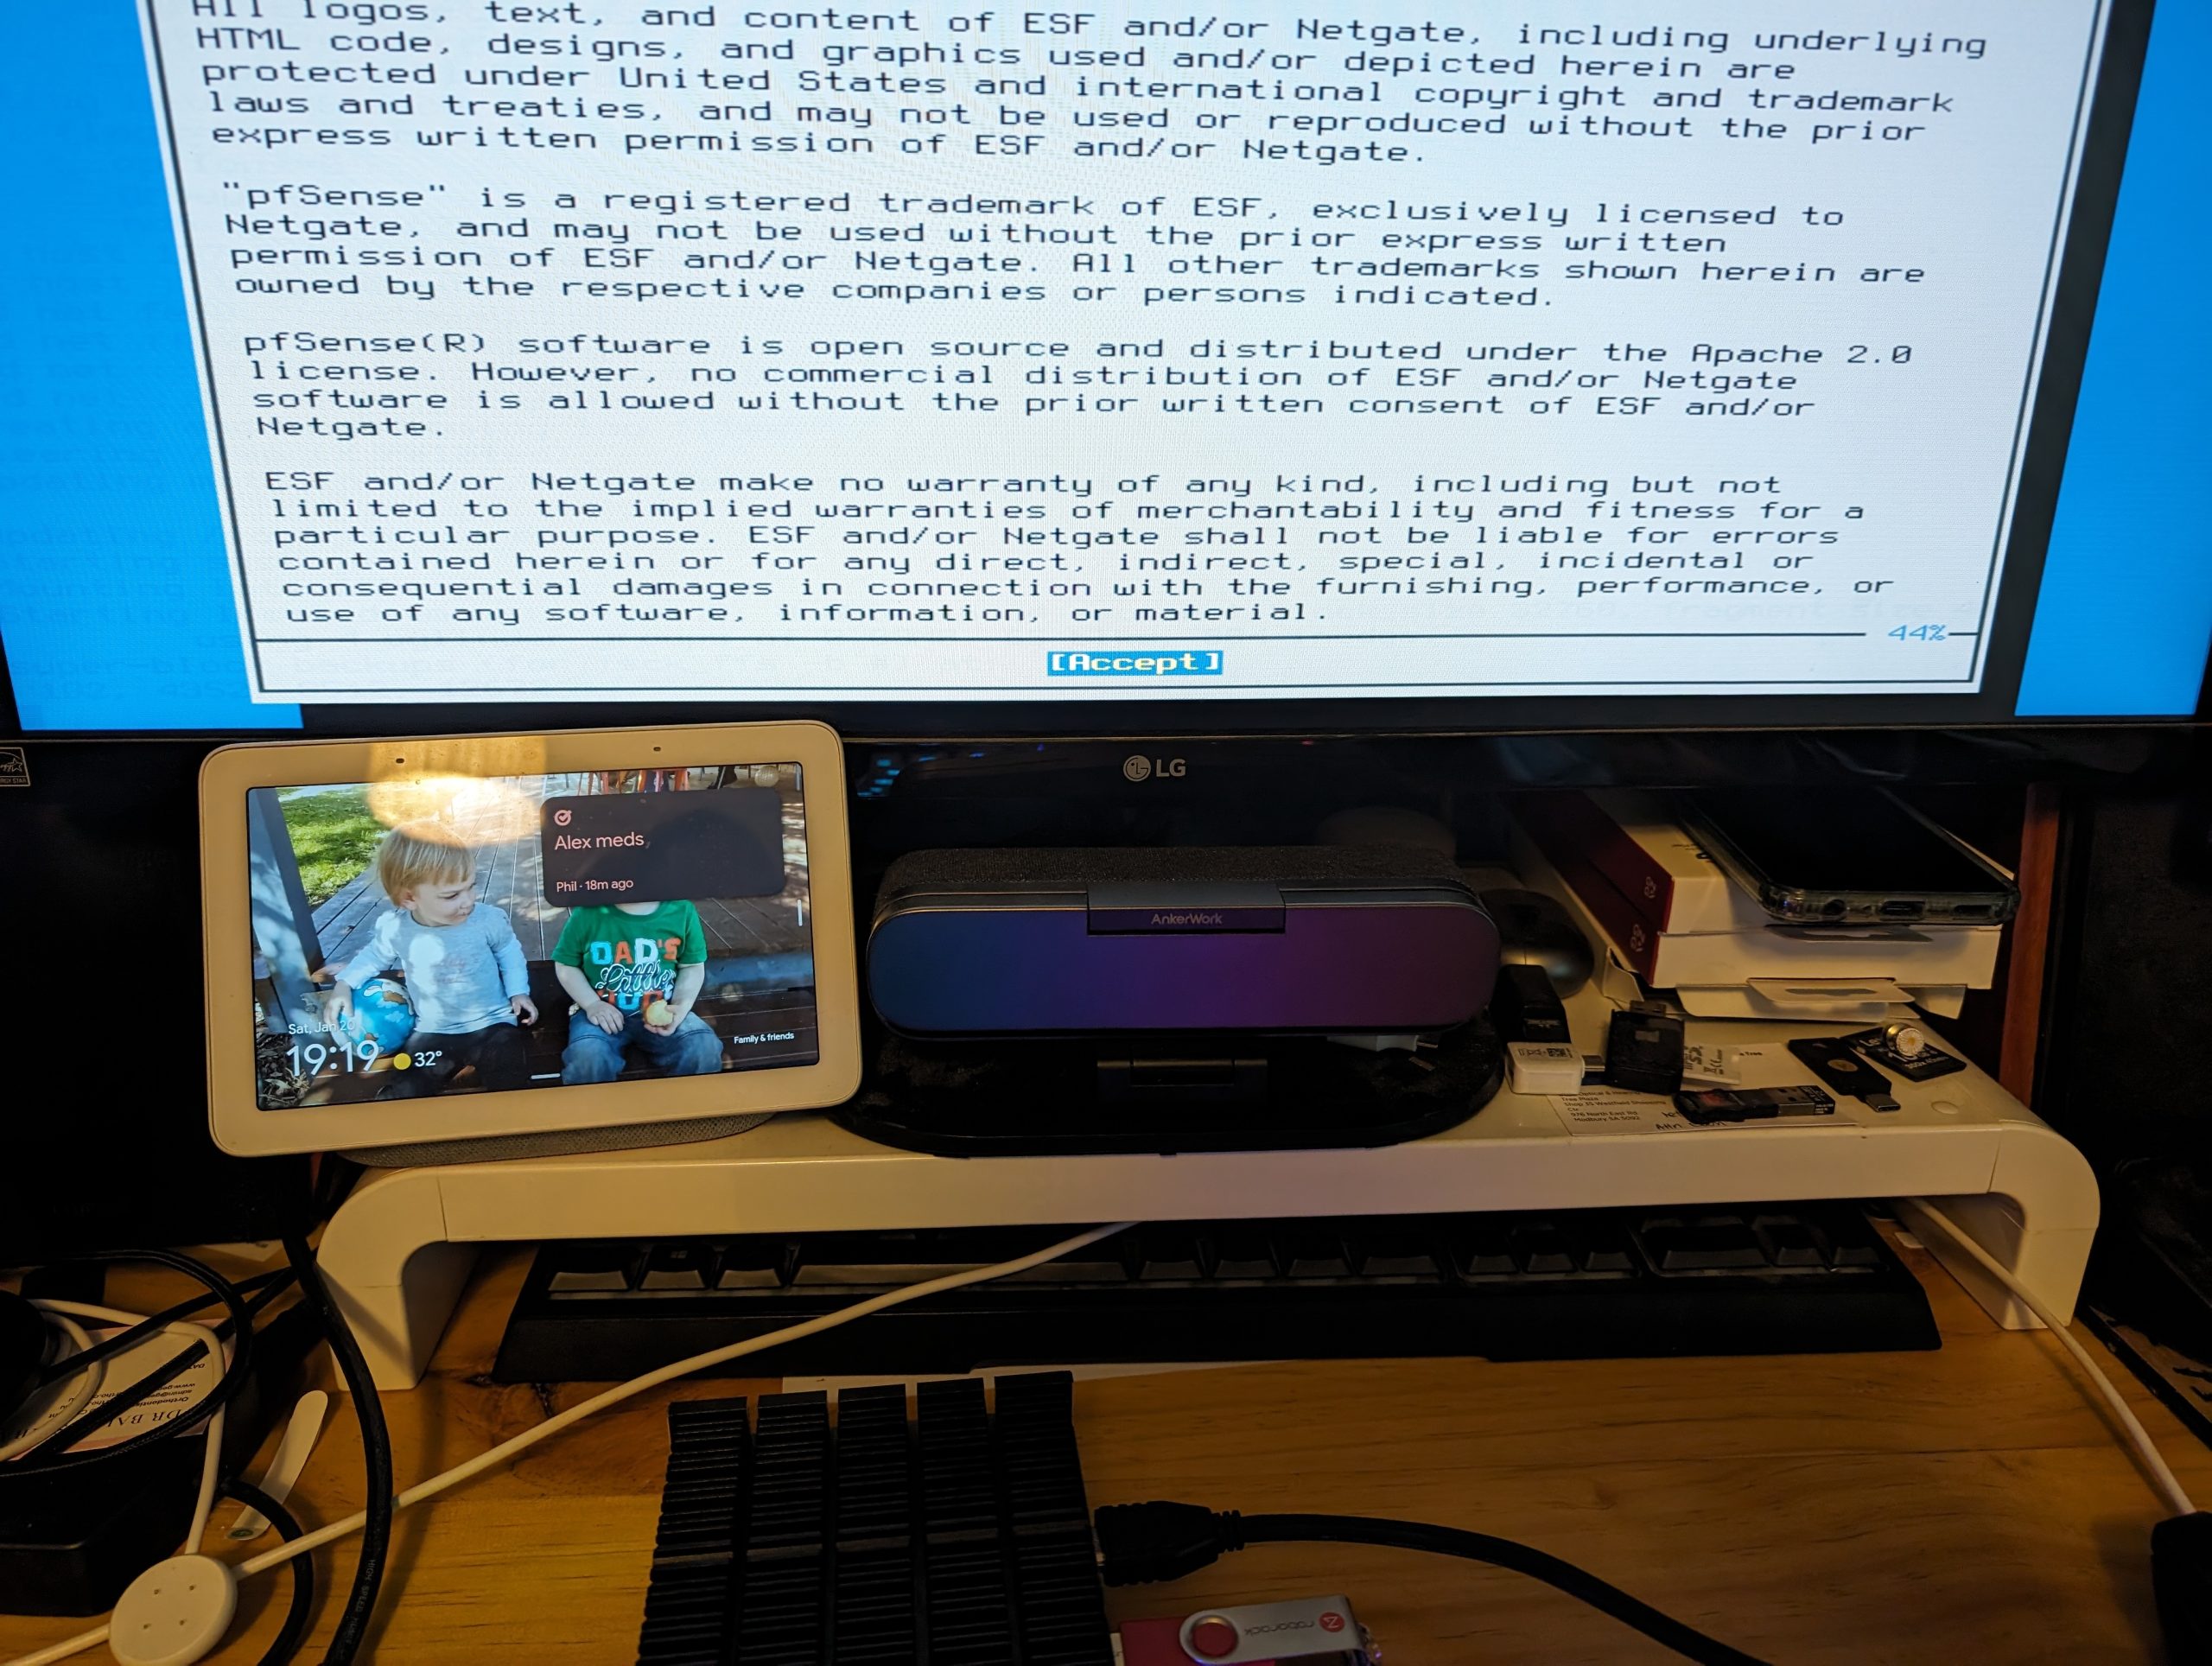
- Accepting the software usage terms and conditions
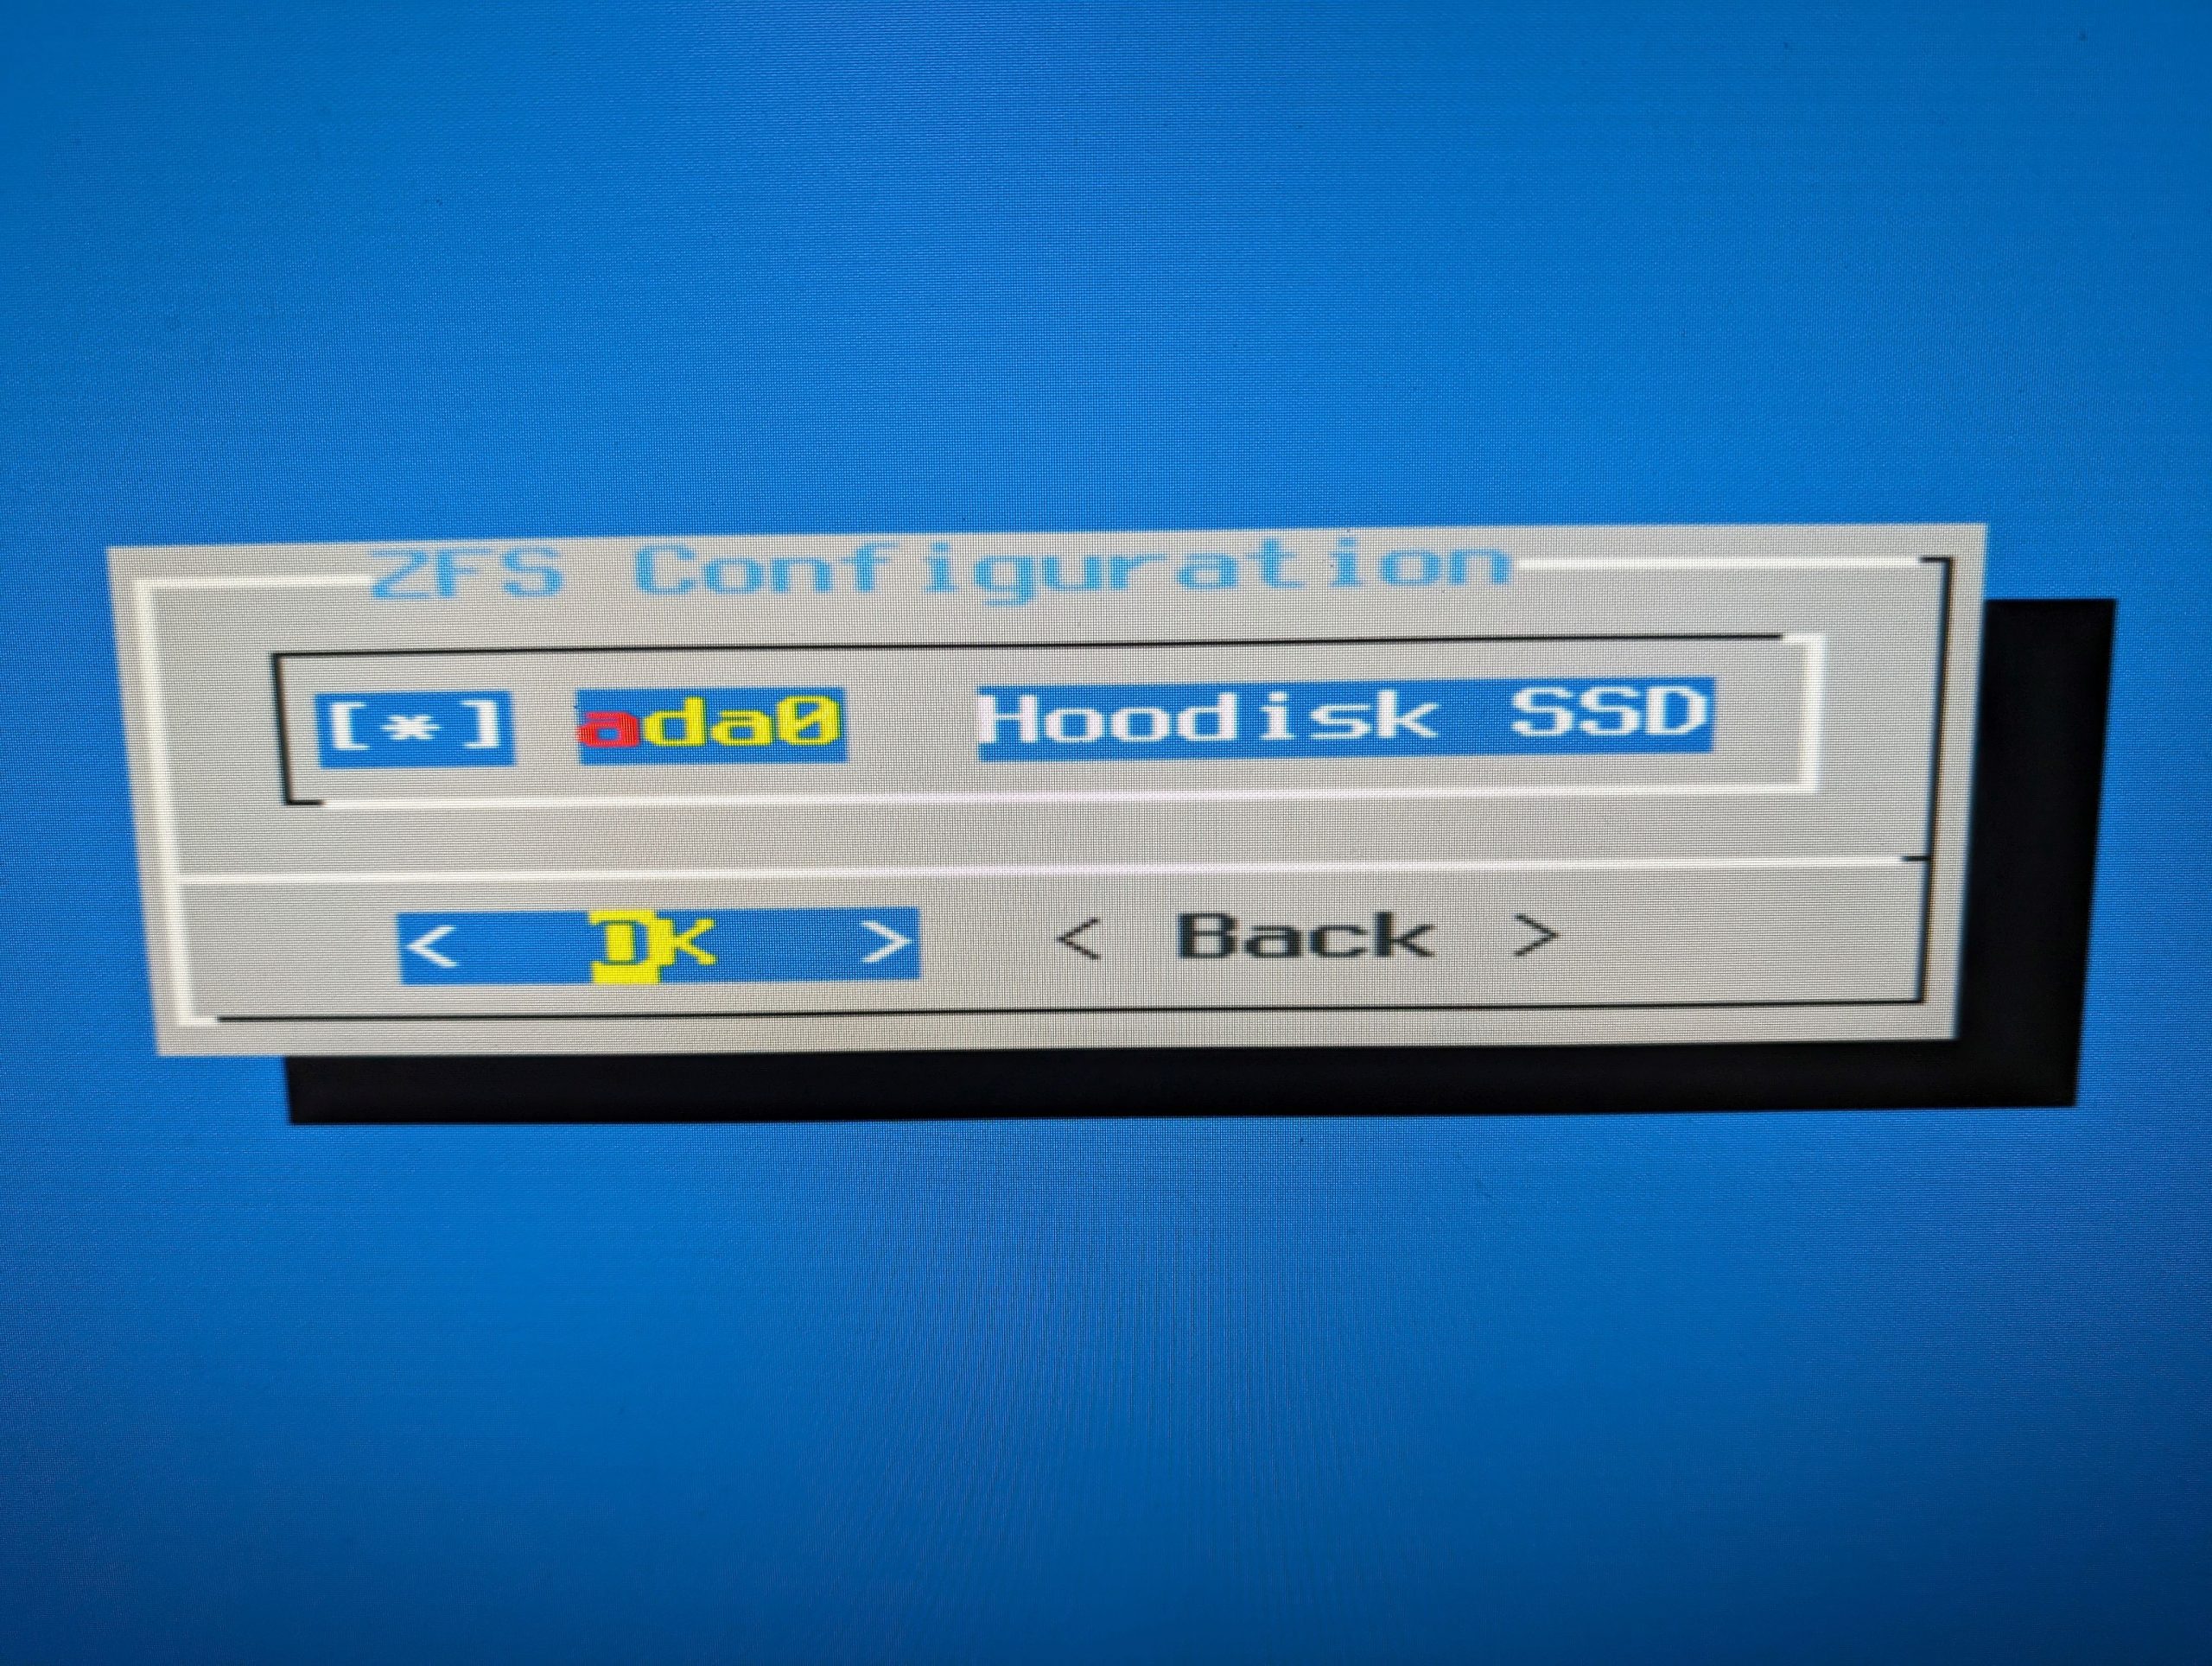
- Select — use your space bar — to install pfSense
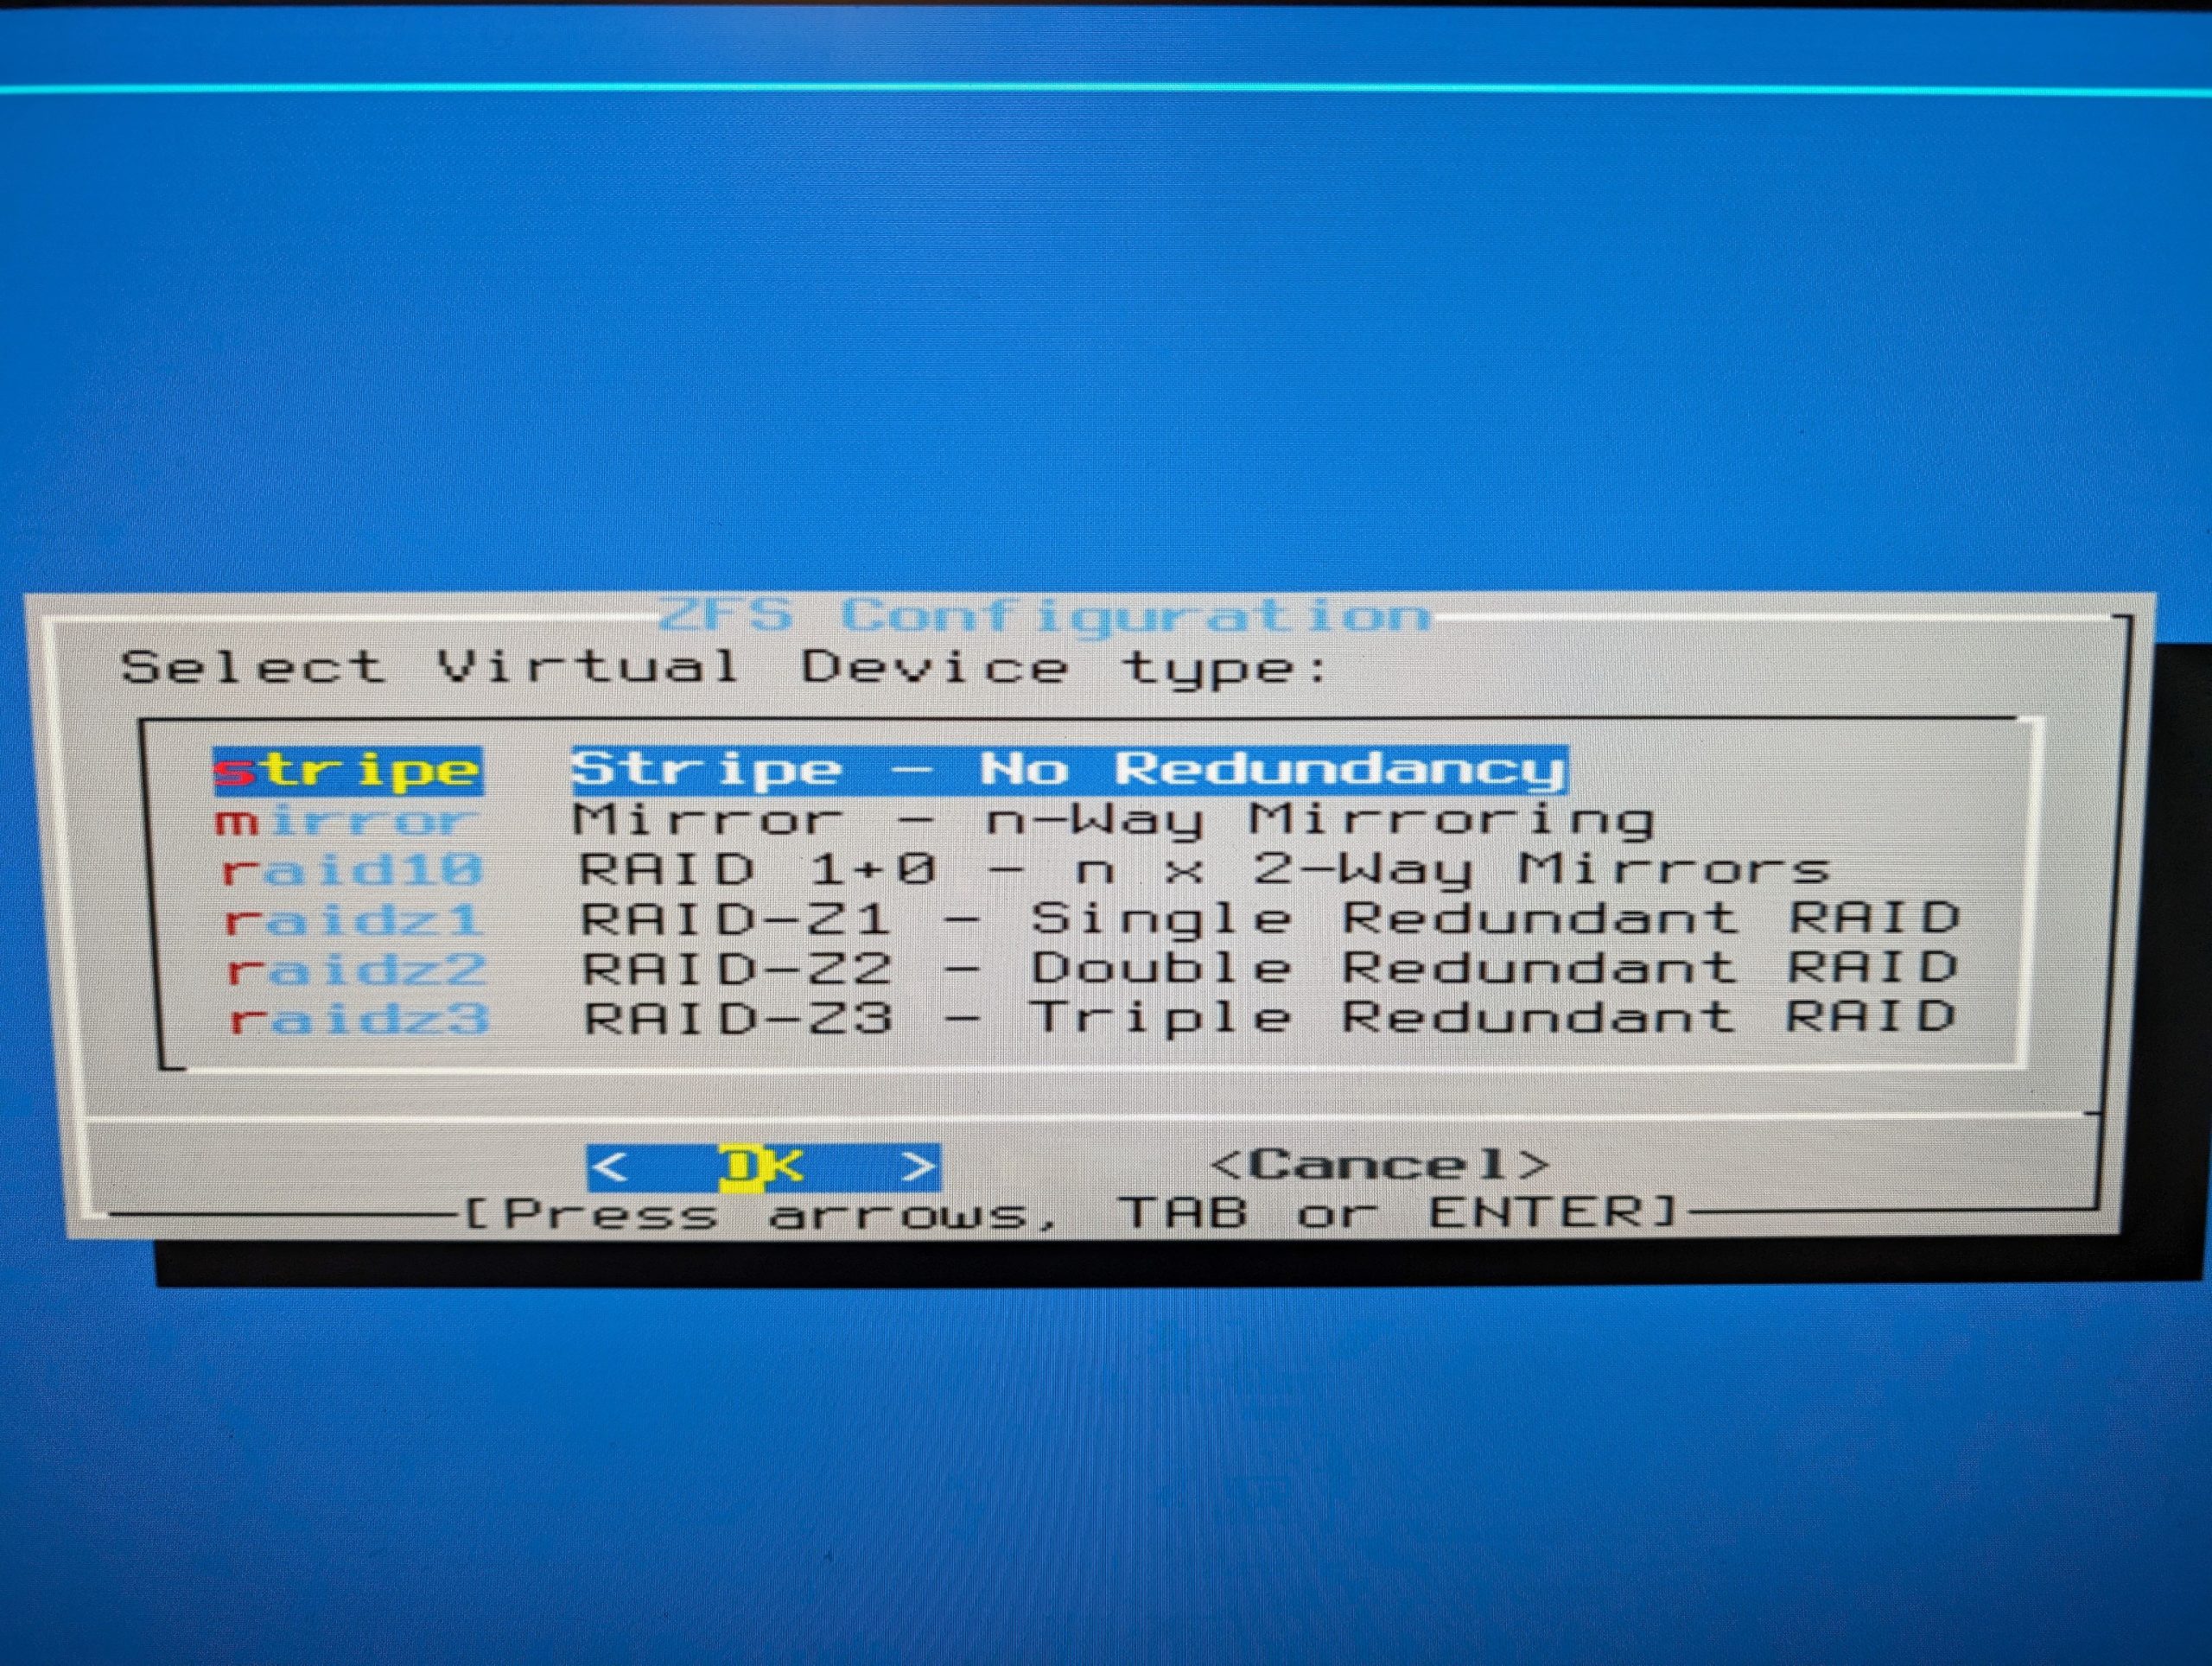
- I’ve used the default settings from here: US keymap, ZFS, Stripe (no redundancy) drive, selected the install destination and installed

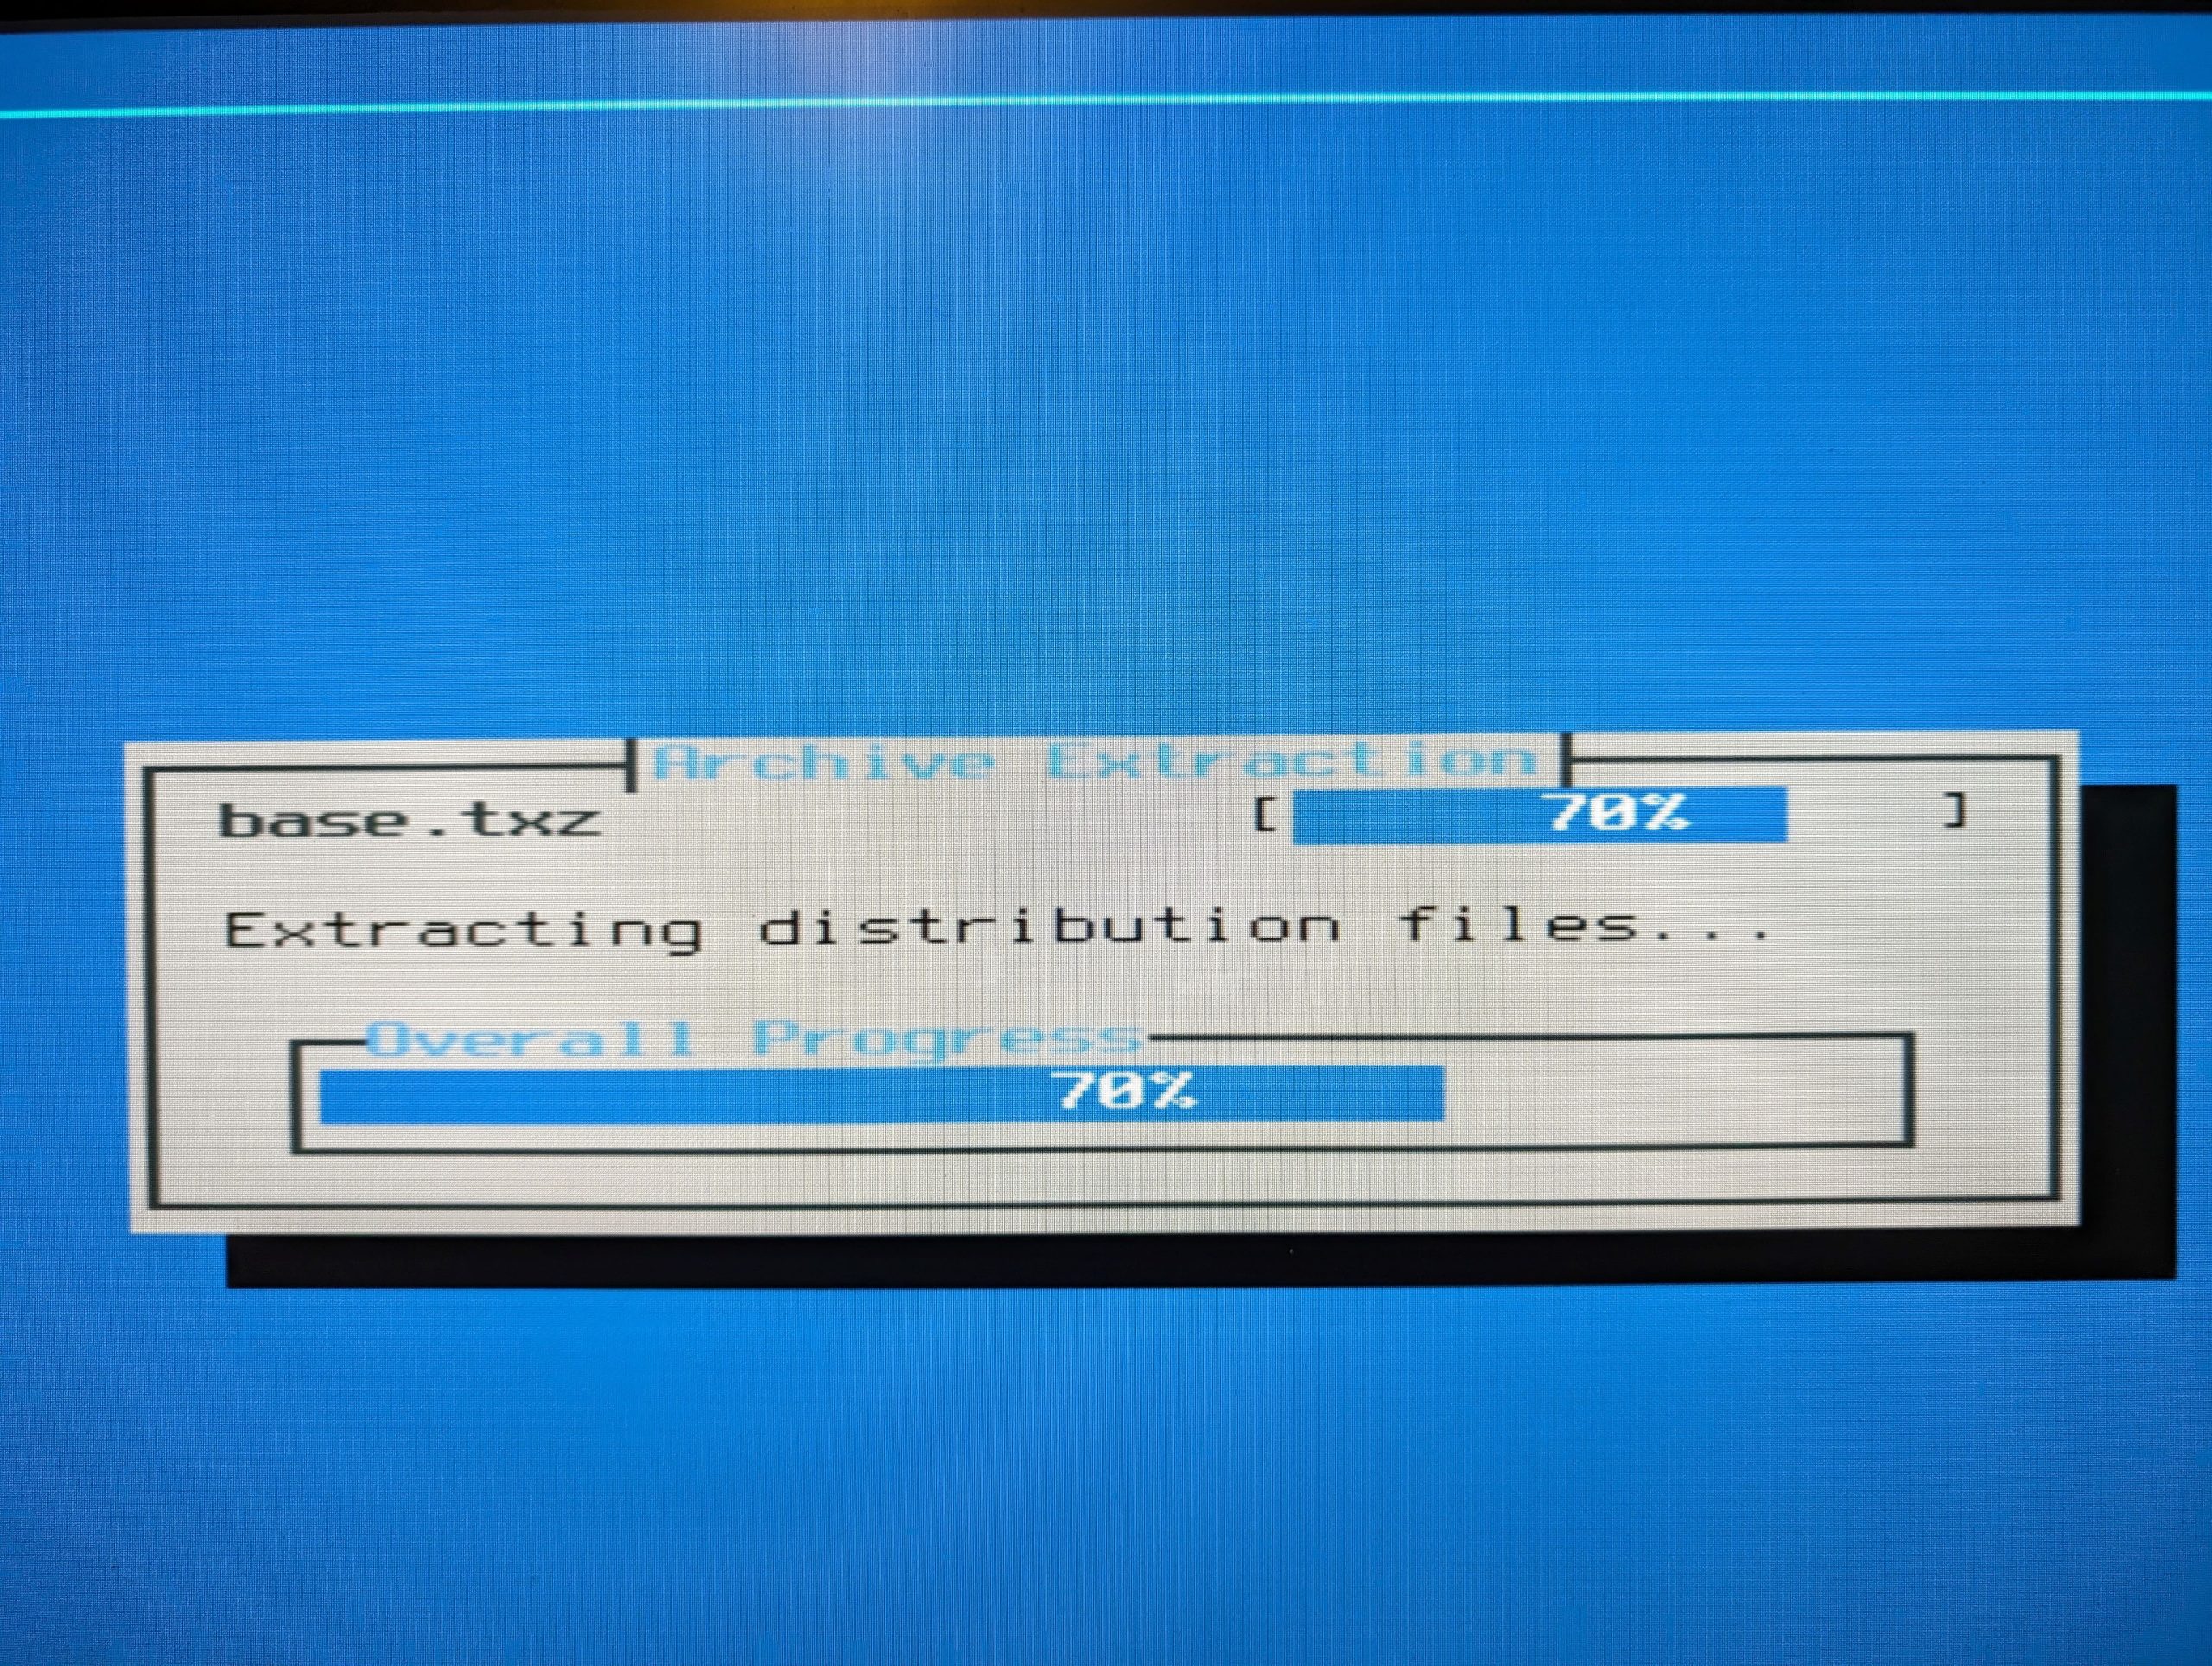
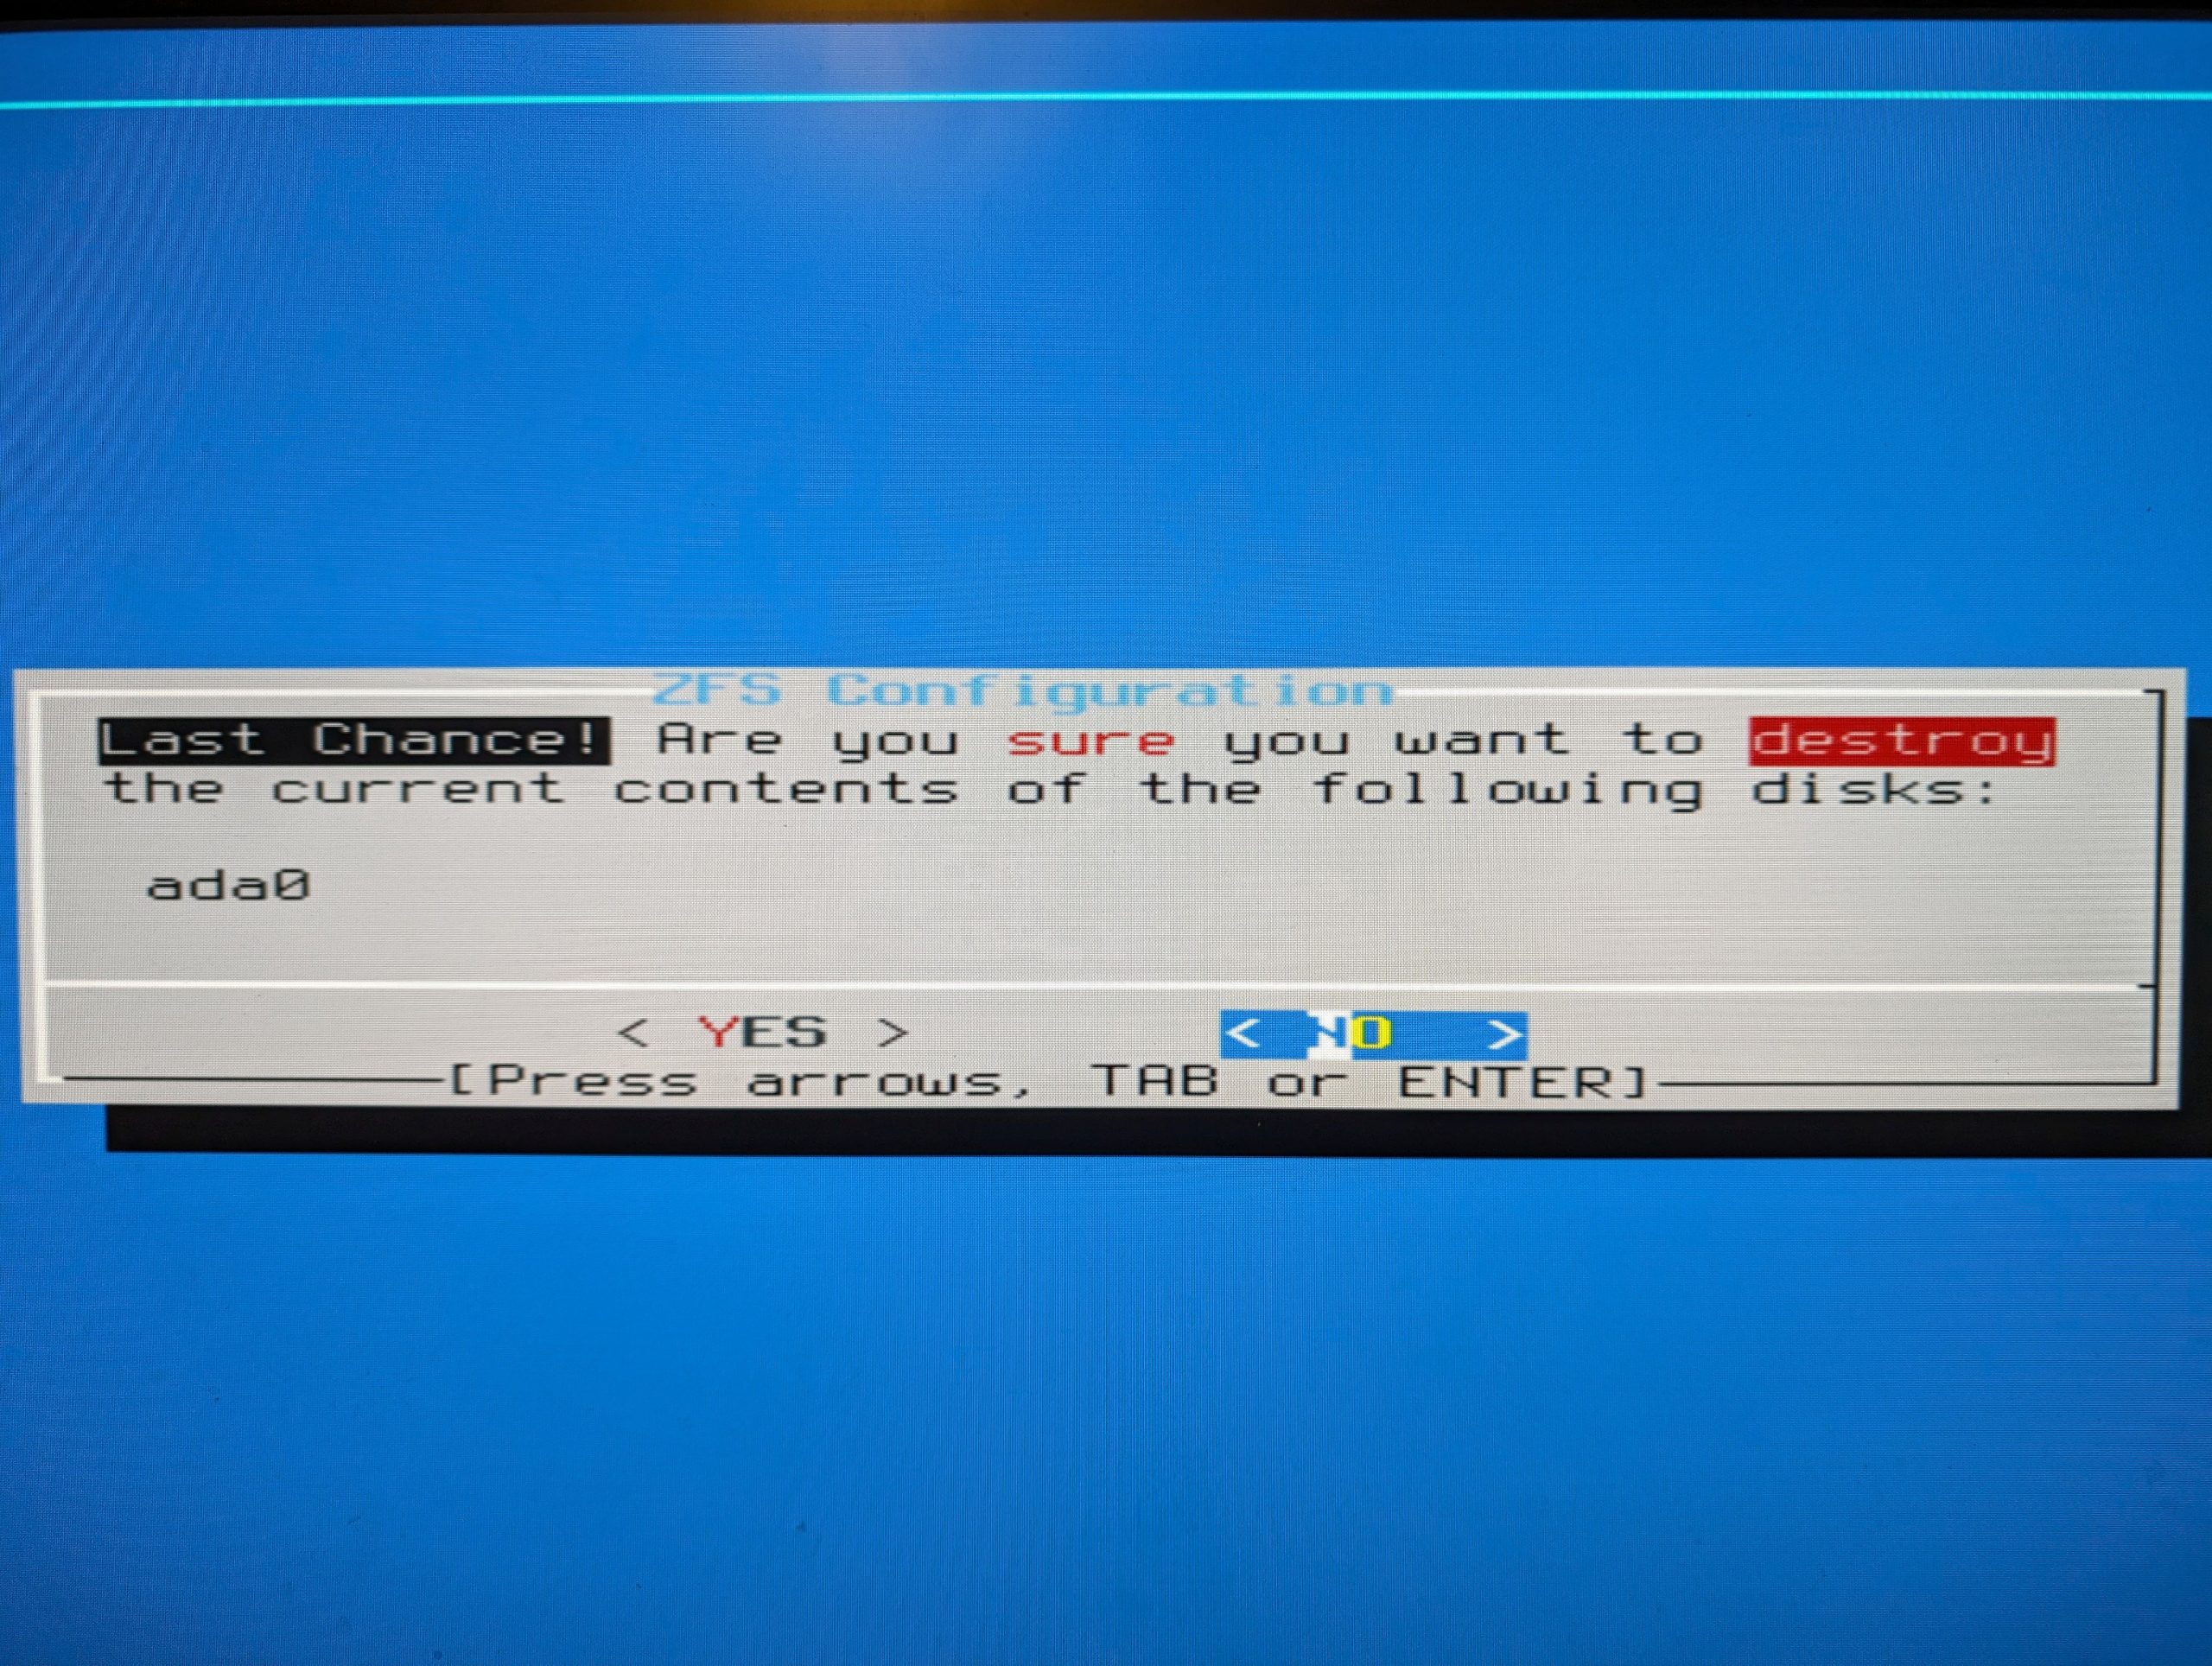

You will be given a final chance to back out of the install, but provided you’ve selected the Protectli Vault drive: It’s go time!
Basic network setup
Providing you’re not going to hear cries of anguish from around your home or business, at this point you can remove your existing router and replace it with the Vault. As the basics won’t take too long to configure from this point.
For most users who are on the NBN, you’ll have a separate modem in place; whether that’s fibre to the premises, HFT or otherwise. But if you’re using something like FTTN, you’ll probably need to switch your existing modem to bridge mode.
If you’re on the former of those two, with a separate modem device in your network already you can repurpose your existing router to become nothing more than a wireless access point. This is one of the benefits I outlined recently when I upgraded my entire home network to D-Link business hardware: Being able to segment the network and improve performance as individual components of the network are no longer doing multiple tasks.
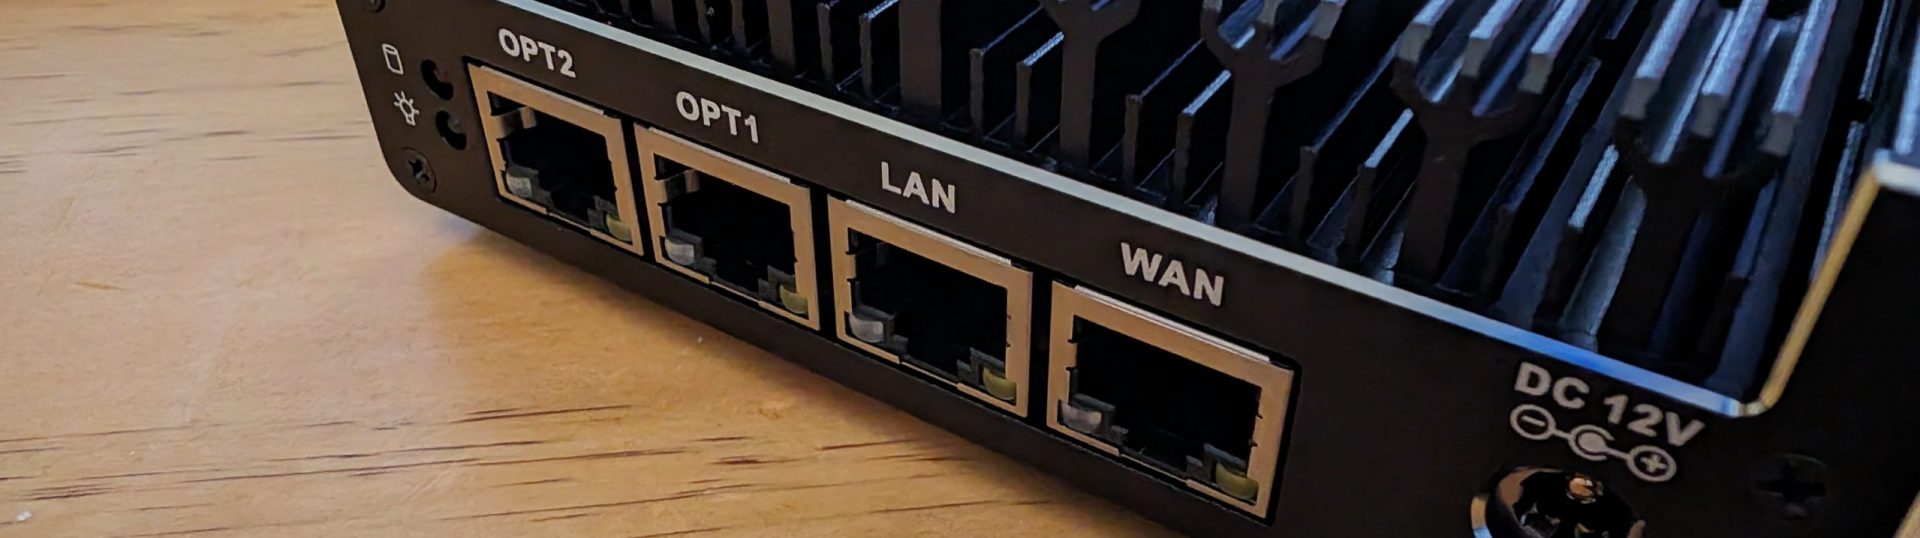
As a default, the IP Address of the Vault will be 192.168.1.1 and it will be issuing DHCP addresses to your network in that subnet. Defaults like this are well known like the default login and password of admin/pfsense.
Changing your defaults is always recommended to eliminate some of the simplest threats to your network.
On a machine that’s on the network, your router is on, you should now be able to connect to the router’s web UI to complete the basic setup. You can do this via your existing network if you wish or by connecting directly to the vault, but it’s important that the Vault has access to the Internet at this point in time.
The basic setup
On first login, you’ll be presented a wizard to complete the absolute basics and you’ll be online from that point forward.
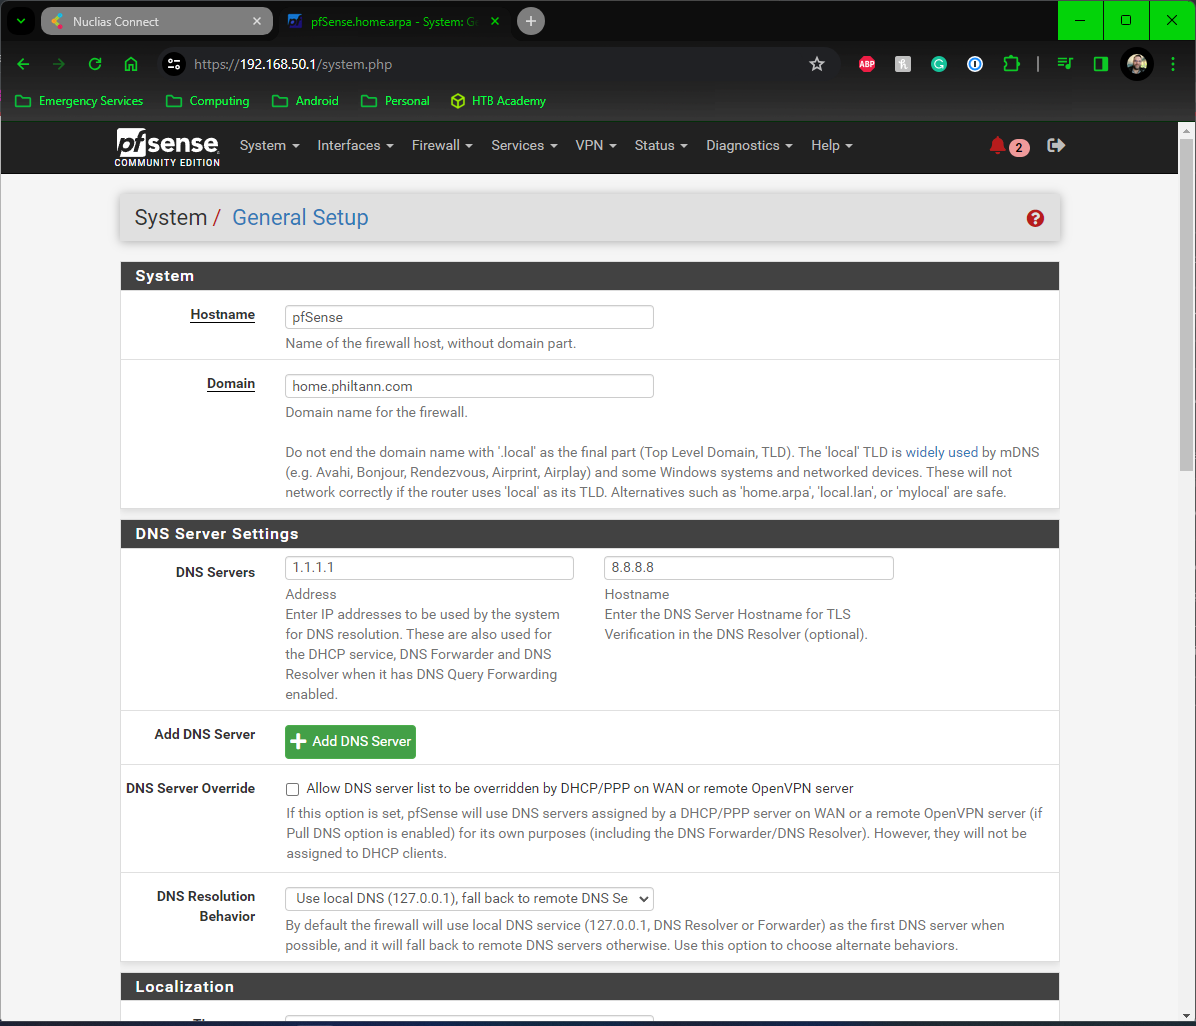
There are a couple of decisions to be made at this point in the wizard, though. The Hostname of the device, the domain it’s attached to and the DNS servers that your network will be routed through. I have a PiHole server running to eliminate ads on my network, but for the purpose of this, I will show the Google DNS servers 8.8.8.8 and 8.8.4.4 and uncheck the override DNS button – as your ISP can, in theory, do this and capture a lot of information about you through your DNS.
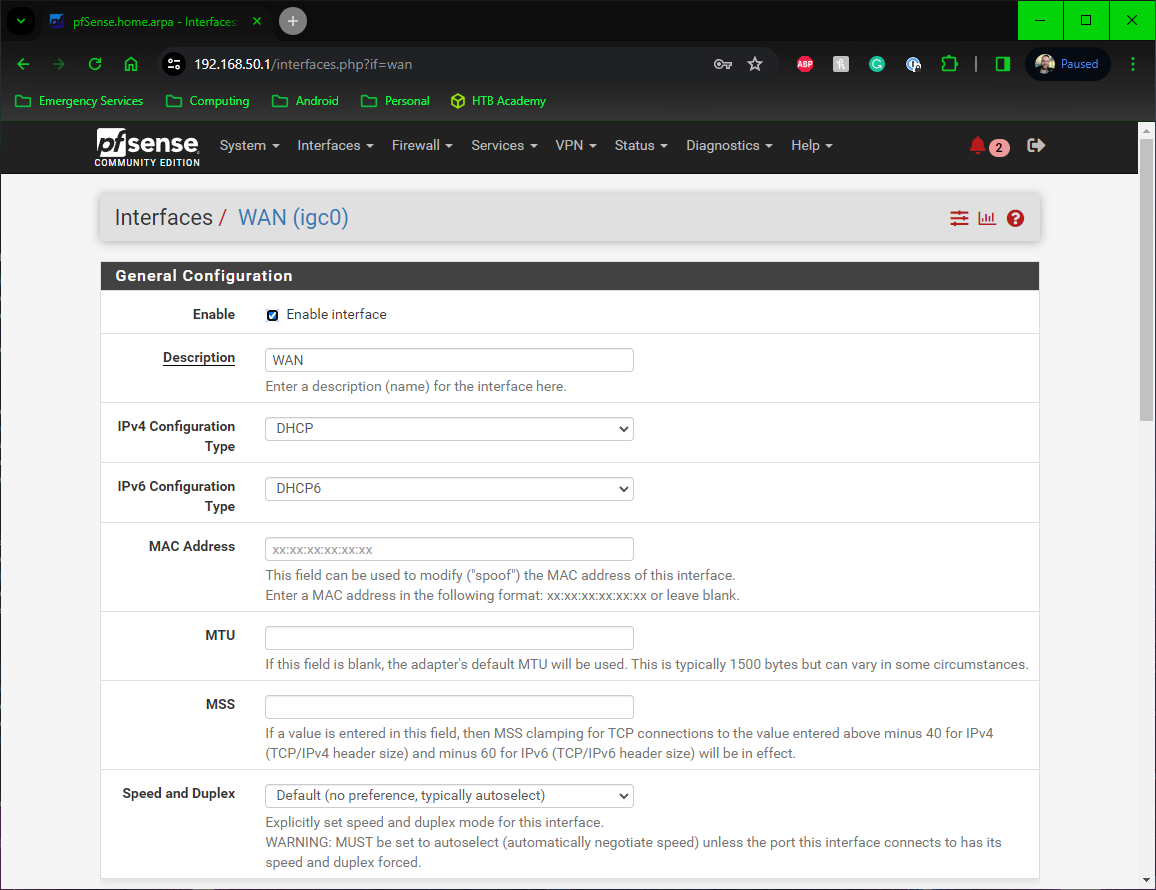
On the next screen select your NTP server and time zone followed by your WAN settings, but with the way NBN is setup, Depending on your ISP configuration, your pfSense router may come online from this point forward, or you may need to enter the PPoE details a little lower on this screen.
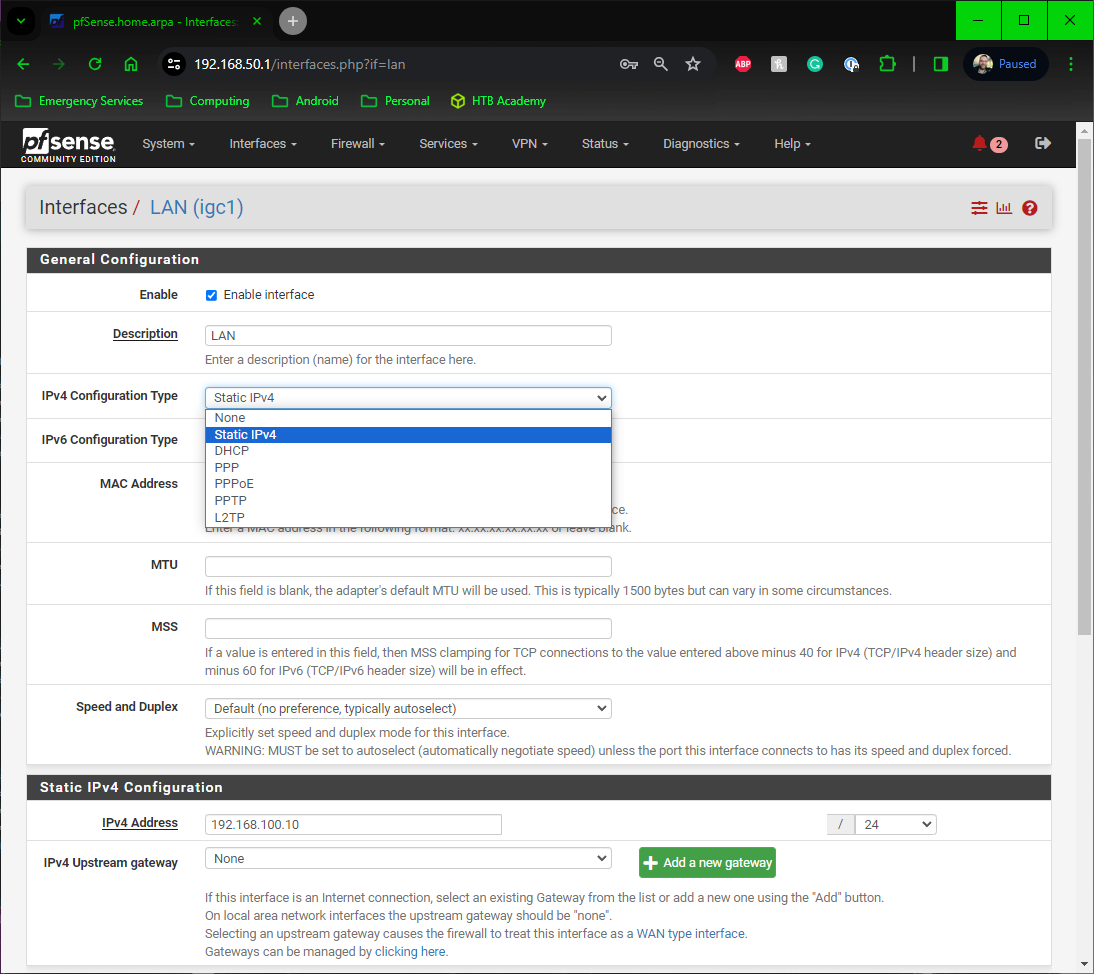
The next screen is where the local IP range (mentioned earlier) is set and I recommend changing this. Whether you choose to move into a 10.x.x.x range, or simply change one of the other octets to move away from that typical range eg. 192.168.100.1
On the final screen of the wizard: Change your default admin password.
This is the gateway machine into and out of your network, so make the password something reasonably complex that adheres to best practice and store it securely. This is the end of the basic setup and you should now be back online.
The next steps: Things to check
If you changed the IP address of the router, you’ve got two options here. The first is to pull the network cable from your computer and plug it back in, or you can renew the IP address (ipconfig /release then ipconfig /renew in command prompt) on your computer.
Once you’ve done this the first thing to check is that you’re trying to access the web UI on the correct IP address, not just a refreshed screen that’s not working. Then, once you’re in, scroll down and check your interfaces – the WAN and LAN port your PC or switch are plugged into should now be online.
If you want or need to assign static IP addresses for certain hardware items in your home, then head to the services tab and hit the DHCP server drop-down. Personally, I tend to keep around 50 addresses at the start of a pool for reserved IPs e.g. 10.10.10.1 as the router, with DHCP assigning IP addresses from 10.10.10.50 – 10.10.10.254. This leaves me a range of 10.10.10.2 – 10.10.10.49 for reserved IPs on items like switches, NAS and other hardware that’s simply easier to use or requires a static IP to operate correctly.
At this point, the default settings — which are actually pretty solid — within pfSense are going to be as good, if not better from a security standpoint than a router provided to you by an ISP. Feel free, of course, to play with the interface and settings as much as you like; after all it’s your router.
In a couple of weeks, we’ll have another addition to this series taking a closer look at VLAN’s, routing and port forwarding.
What further features would you like to explore as we dive deeper into pfSense?